Images are one of the most powerful elements of any website. They attract attention, explain ideas faster than text, and help build trust with users. But there is a hidden problem—large image files can seriously slow down your website.
A slow website affects everything: user experience, SEO ranking, bounce rate, and even conversions. Visitors today expect pages to load instantly. If your images are heavy, users will leave before your content even appears. This is why learning how to compress images for a website is not just a technical skill—it is a business necessity.
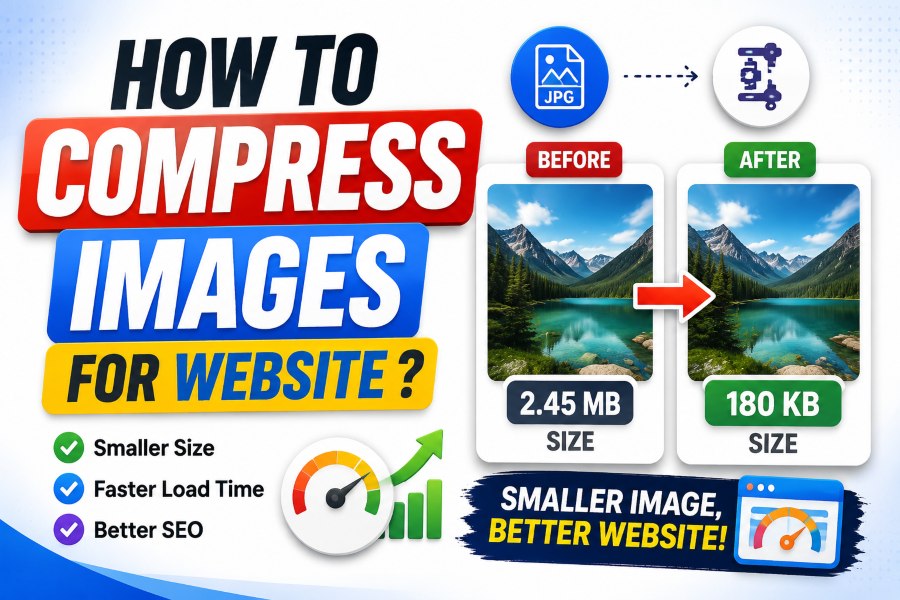
Image compression is the process of reducing file size while keeping visual quality almost unchanged. When done correctly, it helps your website load faster, improves mobile performance, and reduces server load. It also plays a major role in SEO because search engines prefer fast-loading websites.
In this guide, you will learn everything about image compression: formats, tools, techniques, automation, and best practices. You will also understand how professionals maintain high image quality while dramatically reducing file size.
By the end, you will know exactly how to optimize every image you upload—whether it is for a blog, e-commerce store, portfolio, or business website.
Importance of Compressing Images for Website Speed & SEO
Image size directly impacts how fast a website loads. When images are too large, browsers take longer to download them, increasing user wait time. This delay often leads to frustration and early exits from the site.
Website performance is now a ranking factor for search engines. A slow site reduces visibility, while a fast site improves engagement signals like time on page and bounce rate. This is why knowing how to compress images for a website is a critical SEO skill.
A slow-loading page also damages brand trust. Users often judge professionalism based on speed. Even a beautifully designed website loses value if it loads slowly because of large images.
Image compression also reduces bandwidth usage. This is important for websites with high traffic, such as blogs or online stores. Lower file sizes reduce server pressure and improve scalability.
In modern web development, image optimization is no longer optional. It is a core part of performance strategy, especially for mobile-first users.
Step-by-Step Image Compression Process
The step-by-step image compression process shows how to reduce image size without losing quality. It helps improve website speed, SEO, and overall user experience.
Analyze Image Purpose
Understand where the image will be used—on a banner, in a blog post, as a product image, or as a thumbnail. This helps determine the correct size and quality level before compression.
Resize Before Compression
Match image dimensions with actual display size to avoid unnecessary weight. Proper resizing ensures faster loading and better optimization results.
Choose File Format
Select JPEG, PNG, WebP, or AVIF depending on image type. Each format serves a different purpose in terms of quality and compression efficiency.
Apply Compression Tool
Use online or desktop tools for lossy or lossless compression. This step reduces file size while maintaining acceptable visual quality.
Preview and Test
Check the quality before uploading to ensure there is no visible damage. Always compare original and compressed images for best results.
Advanced Optimization Guide
The advanced optimization guide explains how to take image compression beyond the basics to achieve faster load times and better website performance. It covers smarter techniques like responsive images, lazy loading, and automated optimization to ensure maximum speed, SEO benefits, and user experience.
- Resize images before uploading
Large images should never be uploaded directly. A 4000px image displayed at 800px still loads full size, wasting performance. - Use modern formats like WebP and AVIF
These formats provide smaller file sizes compared to JPEG and PNG while maintaining quality. - Balance quality and compression level
Avoid extreme compression. A good range is 70–85% quality for most images. - Separate image types by purpose
- Photos → JPEG/WebP
- Logos → PNG/SVG
- Graphics → PNG
- Modern sites → WebP default
- Remove unnecessary metadata
Extra camera data increases file size without adding value. - Use batch compression tools
If you manage many images, batch processing saves time and ensures consistency. - Always preview before publishing
Check clarity on mobile and desktop to ensure quality is preserved. - Optimize for mobile first
Mobile users often suffer the most from heavy images. - Use lazy loading techniques
Load images only when users scroll to them. - Keep consistent image sizes across pages
This improves layout stability and visual balance.
Tools and Techniques Explained
Image compression tools fall into three main categories: online tools, desktop apps, and automated systems. Each has different strengths depending on workflow needs.
Online tools are simple and fast. They allow users to upload images, compress them instantly, and download optimized versions. These are ideal for bloggers or small websites that do not handle large volumes of images.
Desktop tools provide more control. They allow batch processing, advanced compression settings, and offline usage. Designers and developers often prefer these tools because they offer precision and flexibility.
Automation tools are the most powerful solution. Plugins and CDN-based systems automatically compress images during upload or delivery. This removes manual work completely and ensures consistent optimization.
Modern CDNs also further improve performance by dynamically resizing and converting images based on users’ devices. This means mobile users receive smaller images while desktop users get higher-resolution versions.
When learning how to compress images for a website, the tool you choose should match your workflow scale. Small websites can rely on simple tools, while large platforms need automation and CDN-level optimization.
SEO Best Practices for How to Compress Images for a Website
SEO best practices for how to compress images for a website focus on optimizing image size, format, and quality to improve loading speed and search performance. By following these techniques, you can enhance user experience, reduce page weight, and boost overall SEO results effectively.
Optimize Before Uploading
Always prepare images before adding them to your website. This includes resizing, cropping, and choosing the correct format to ensure better performance from the start.
Use Smart Naming Conventions
File names should describe the image content clearly for both users and search engines. This helps improve image SEO and content relevance.
Add Meaningful Alt Text
Alt text improves accessibility and helps search engines understand the image context. It should be natural, descriptive, and relevant to the page topic.
Enable Responsive Images
Different screen sizes should load different image versions for faster performance. This ensures better speed and user experience across all devices.
Use Lazy Loading
Images should load only when they become visible on screen. This improves initial page speed and reduces unnecessary bandwidth usage.
Understanding Image Compression
Image compression reduces file size while preserving visible quality. It works by removing unnecessary data or storing image information more efficiently.
There are two main types:
- Lossy compression (reduces some data permanently)
- Lossless compression (preserves all original data)
Lossy is commonly used for web performance, while lossless is used for precision graphics.
Performance Problems Caused by Oversized Website Images
Heavy images slow down page loading, especially on mobile devices. This leads to poor user experience and higher bounce rates.
Slow websites also lose SEO value because search engines prioritize fast-loading pages. Even a few seconds can significantly affect engagement.
Best Image Formats for Websites
- JPEG → best for photos
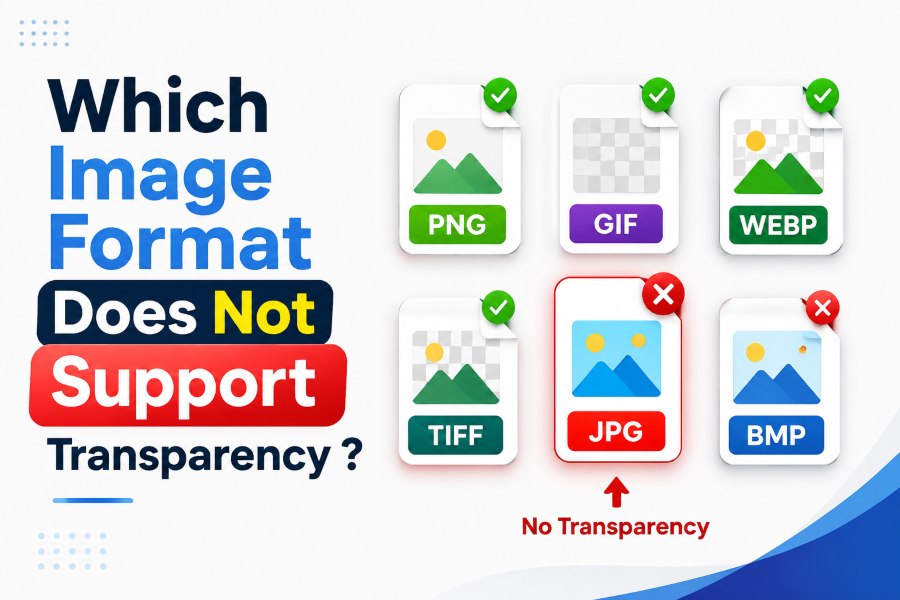
- PNG → best for transparency
- WebP → best overall web format
- AVIF → advanced compression format
- SVG → vector graphics
Choosing the correct format is the first step in mastering image compression for a website.
Compression Workflow for Maximum Website Speed
This compression workflow outlines a simple yet powerful process for optimizing images to improve loading speed and overall website performance. By following each step carefully, you can significantly reduce file size while maintaining visual quality.
- Resize images
Adjust image dimensions to match the actual display size before uploading. - Convert to modern formats
Use formats like WebP or AVIF for better compression and a better balance of quality. - Compress using tools
Apply online or desktop compression tools to reduce file size. - Remove metadata
Delete unnecessary camera or file data that increases image weight. - Test performance
Check page speed and image clarity after uploading. - Optimize again if needed
Re-compress or adjust settings to achieve a better balance between quality and speed.
Advanced Performance Techniques
- Use CDN image delivery
- Implement responsive images
- Enable caching
- Use lazy loading
- Automate compression workflows
These techniques ensure long-term performance stability.
Summary
Learning how to compress images for a website is one of the most powerful ways to improve performance. It reduces file size, improves SEO, enhances user experience, and increases conversion rates.
A well-optimized website is not just visually appealing—it is fast, efficient, and user-friendly. By applying image compression techniques consistently, you ensure that your website remains competitive in modern search rankings.
FAQ’s
What is image compression for websites?
It is the process of reducing image file size while maintaining visual quality.
Does compression affect image quality?
Only if overdone. Balanced compression keeps images clear and lightweight.
Which format is best for websites?
WebP is the most efficient modern format for web performance.
How does compression help SEO?
It improves page speed, which is a ranking factor for search engines.
Should I compress images before uploading?
Yes, always resize and compress before uploading to your website.
Can plugins automate image compression?
Yes, many tools and plugins can automatically compress images on upload.